Shuk ’n Awe!
How to turn market bags into beautiful items for the home
I hate waste. And I love creating things. If I can create something from what ordinarily might become trash, then I am a happy camper (well, retiree if we are being literal).
We eat a lot of fruits and vegetables bought mostly at Netanya's wonderful shuk. And each kilo of cucumbers, each vine of tomatoes, and every fennel bulb gets its own colorful bag. I even send my husband on his shuk runs with instructions to choose certain color bags.
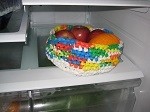
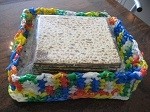
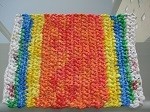
From left to right: Fruit Basket Matzah Basket and a Place Mat
What started with my using the somewhat larger plastic American grocery and drug store bags to crochet reusable market bags has blossomed into a full scale line of home décor items: colorful waterproof tote bags; baskets to hold produce on the counter or in the fridge; pillows for the beach; lumbar pillows for the car; wine bottle bags and sets of placemats.
My aim is not to teach you to crochet. You can learn that on the Internet. My goal is to inspire you to sort and save your bags, cut and wind them into plarn, and crochet your own décor or gift items. I give away about half of what I make—nice hostess gifts when filled with produce or a bottle of wine.
I have experimented with various types of patterns to make use of the beautiful colors of the shuk bags.
I fold and sort my bags by color and keep them in reusable market bags until I am ready to cut and join them and wind balls of plarn, or plastic yarn.
Making the plarn is the most time consuming step. Once you master the technique, you can do it while watching TV.
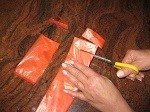
Prepare each bag by folding in the side pleats and straightening the handles and then folding the bag lengthwise twice. Cut off a narrow strip on the sealed end and cut off the handles. (I save these scraps to use as pillow stuffing.) With the remaining center portion of the bag, cut into crosswise strips about 1½ inches or 4 cm wide. You do not need to measure this; just eyeball it. You will have loops of plastic.
If you plan to make a solid or a striped area, then you should loop like colors together. If you plan to make a tweedy, multicolored item, then you should change color with every loop.
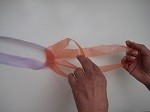
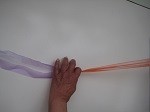
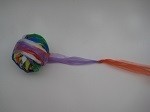
Follow the photograph of my hands inserting one loop through another and then pulling tightly to join them. When you have a meter or so of connected loops, begin winding them into a ball as you would for yarn.
You will be crocheting with a doubled strand of looped plastic.
I often keep balls of colored plarn ready for use. I find that this plarn works with crochet instructions that call for chunky yarn.
I use a very large crochet hook – an American size N hook, but the size is not crucial. You can use whatever large-size hook allows you to handle the doubled strand of plastic.
To change colors you gently unknot the plastic and then re-knot the next color. I try to change colors near the end of a row but have found it best (as for the placemats, for example) to do it a few stitches before or a few stitches after the end of a row if necessary so as not to leave long pieces of plastic to be worked into the fabric after completion of the item.
Have fun combining colors for a tweedy look or planning stripes or blocks of color or combining random and planned colors in one item. No more plastic bags to fly into the bushes or catch on fences or spoil our beaches!






Comments